Slides includes a range of preset fonts, but you can also use custom fonts from Google Fonts, Adobe Fonts (formerly Typekit), or your own host to match your brand or give a presentation its own personality.
Use fonts from Google
Follow these steps to load a Google Font and apply it to your presentation.
Open the CSS editor.
-
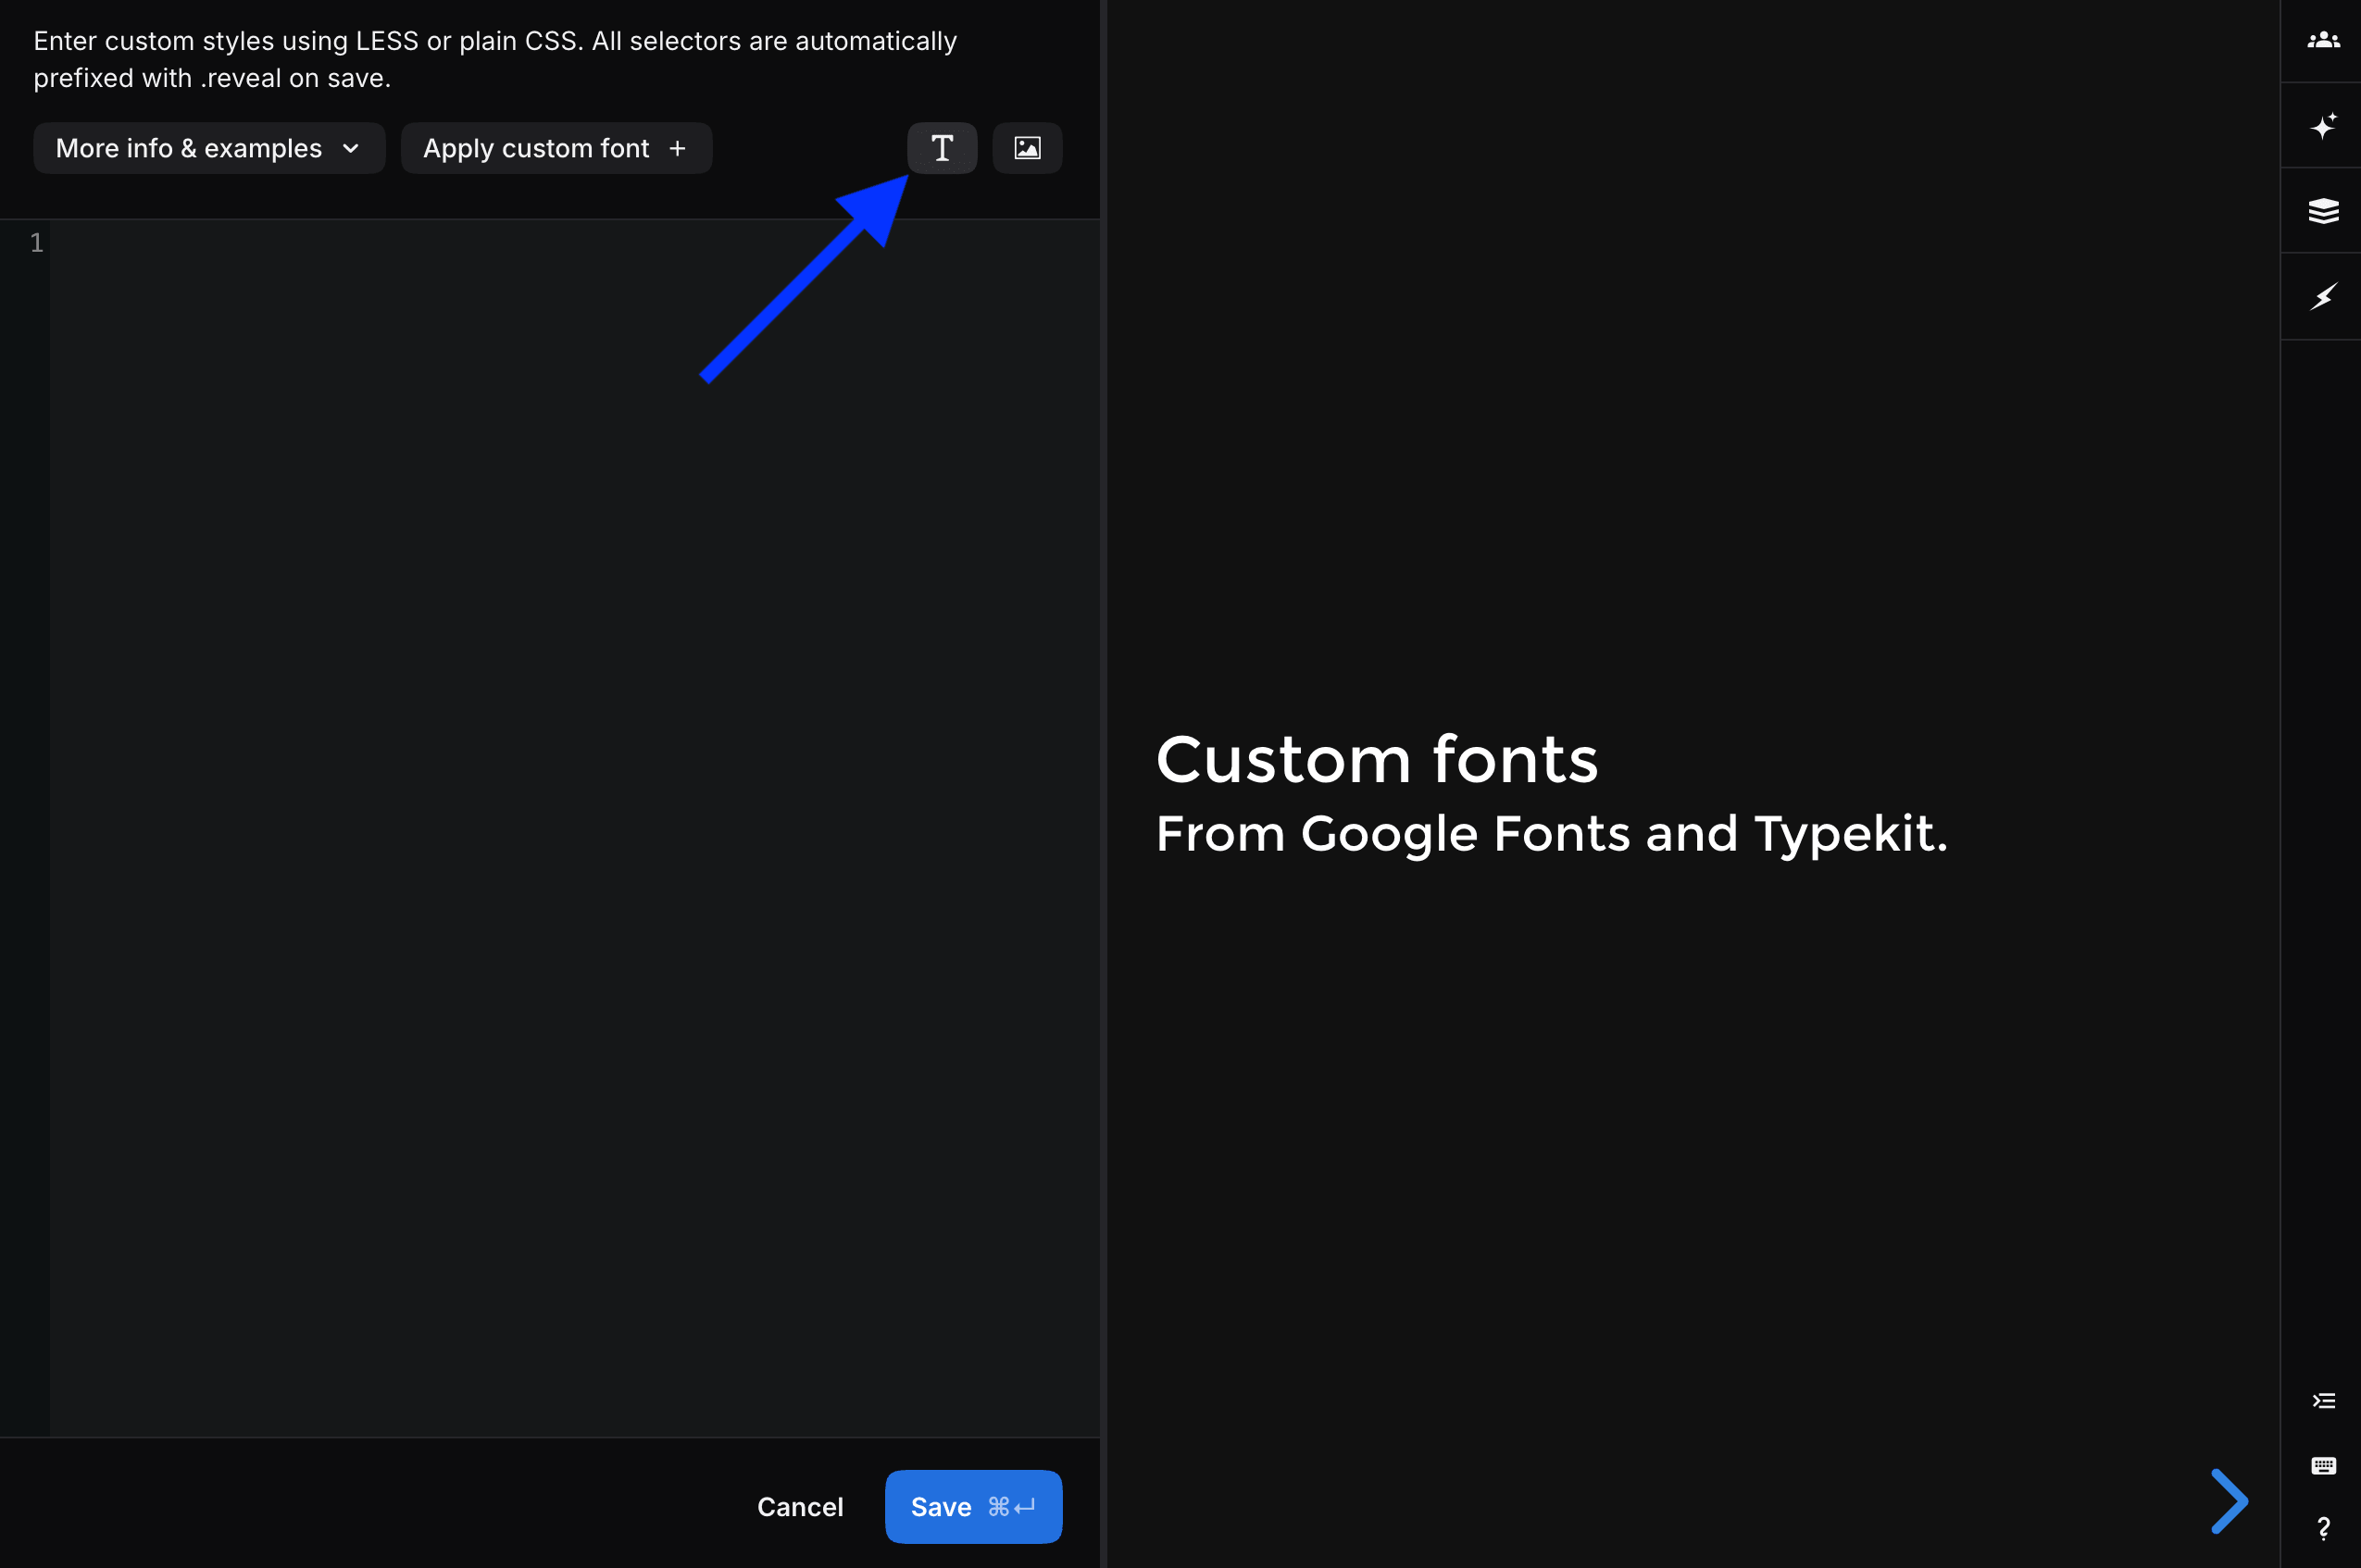
Select the Custom fonts button, represented by a T in the upper-right corner.
-
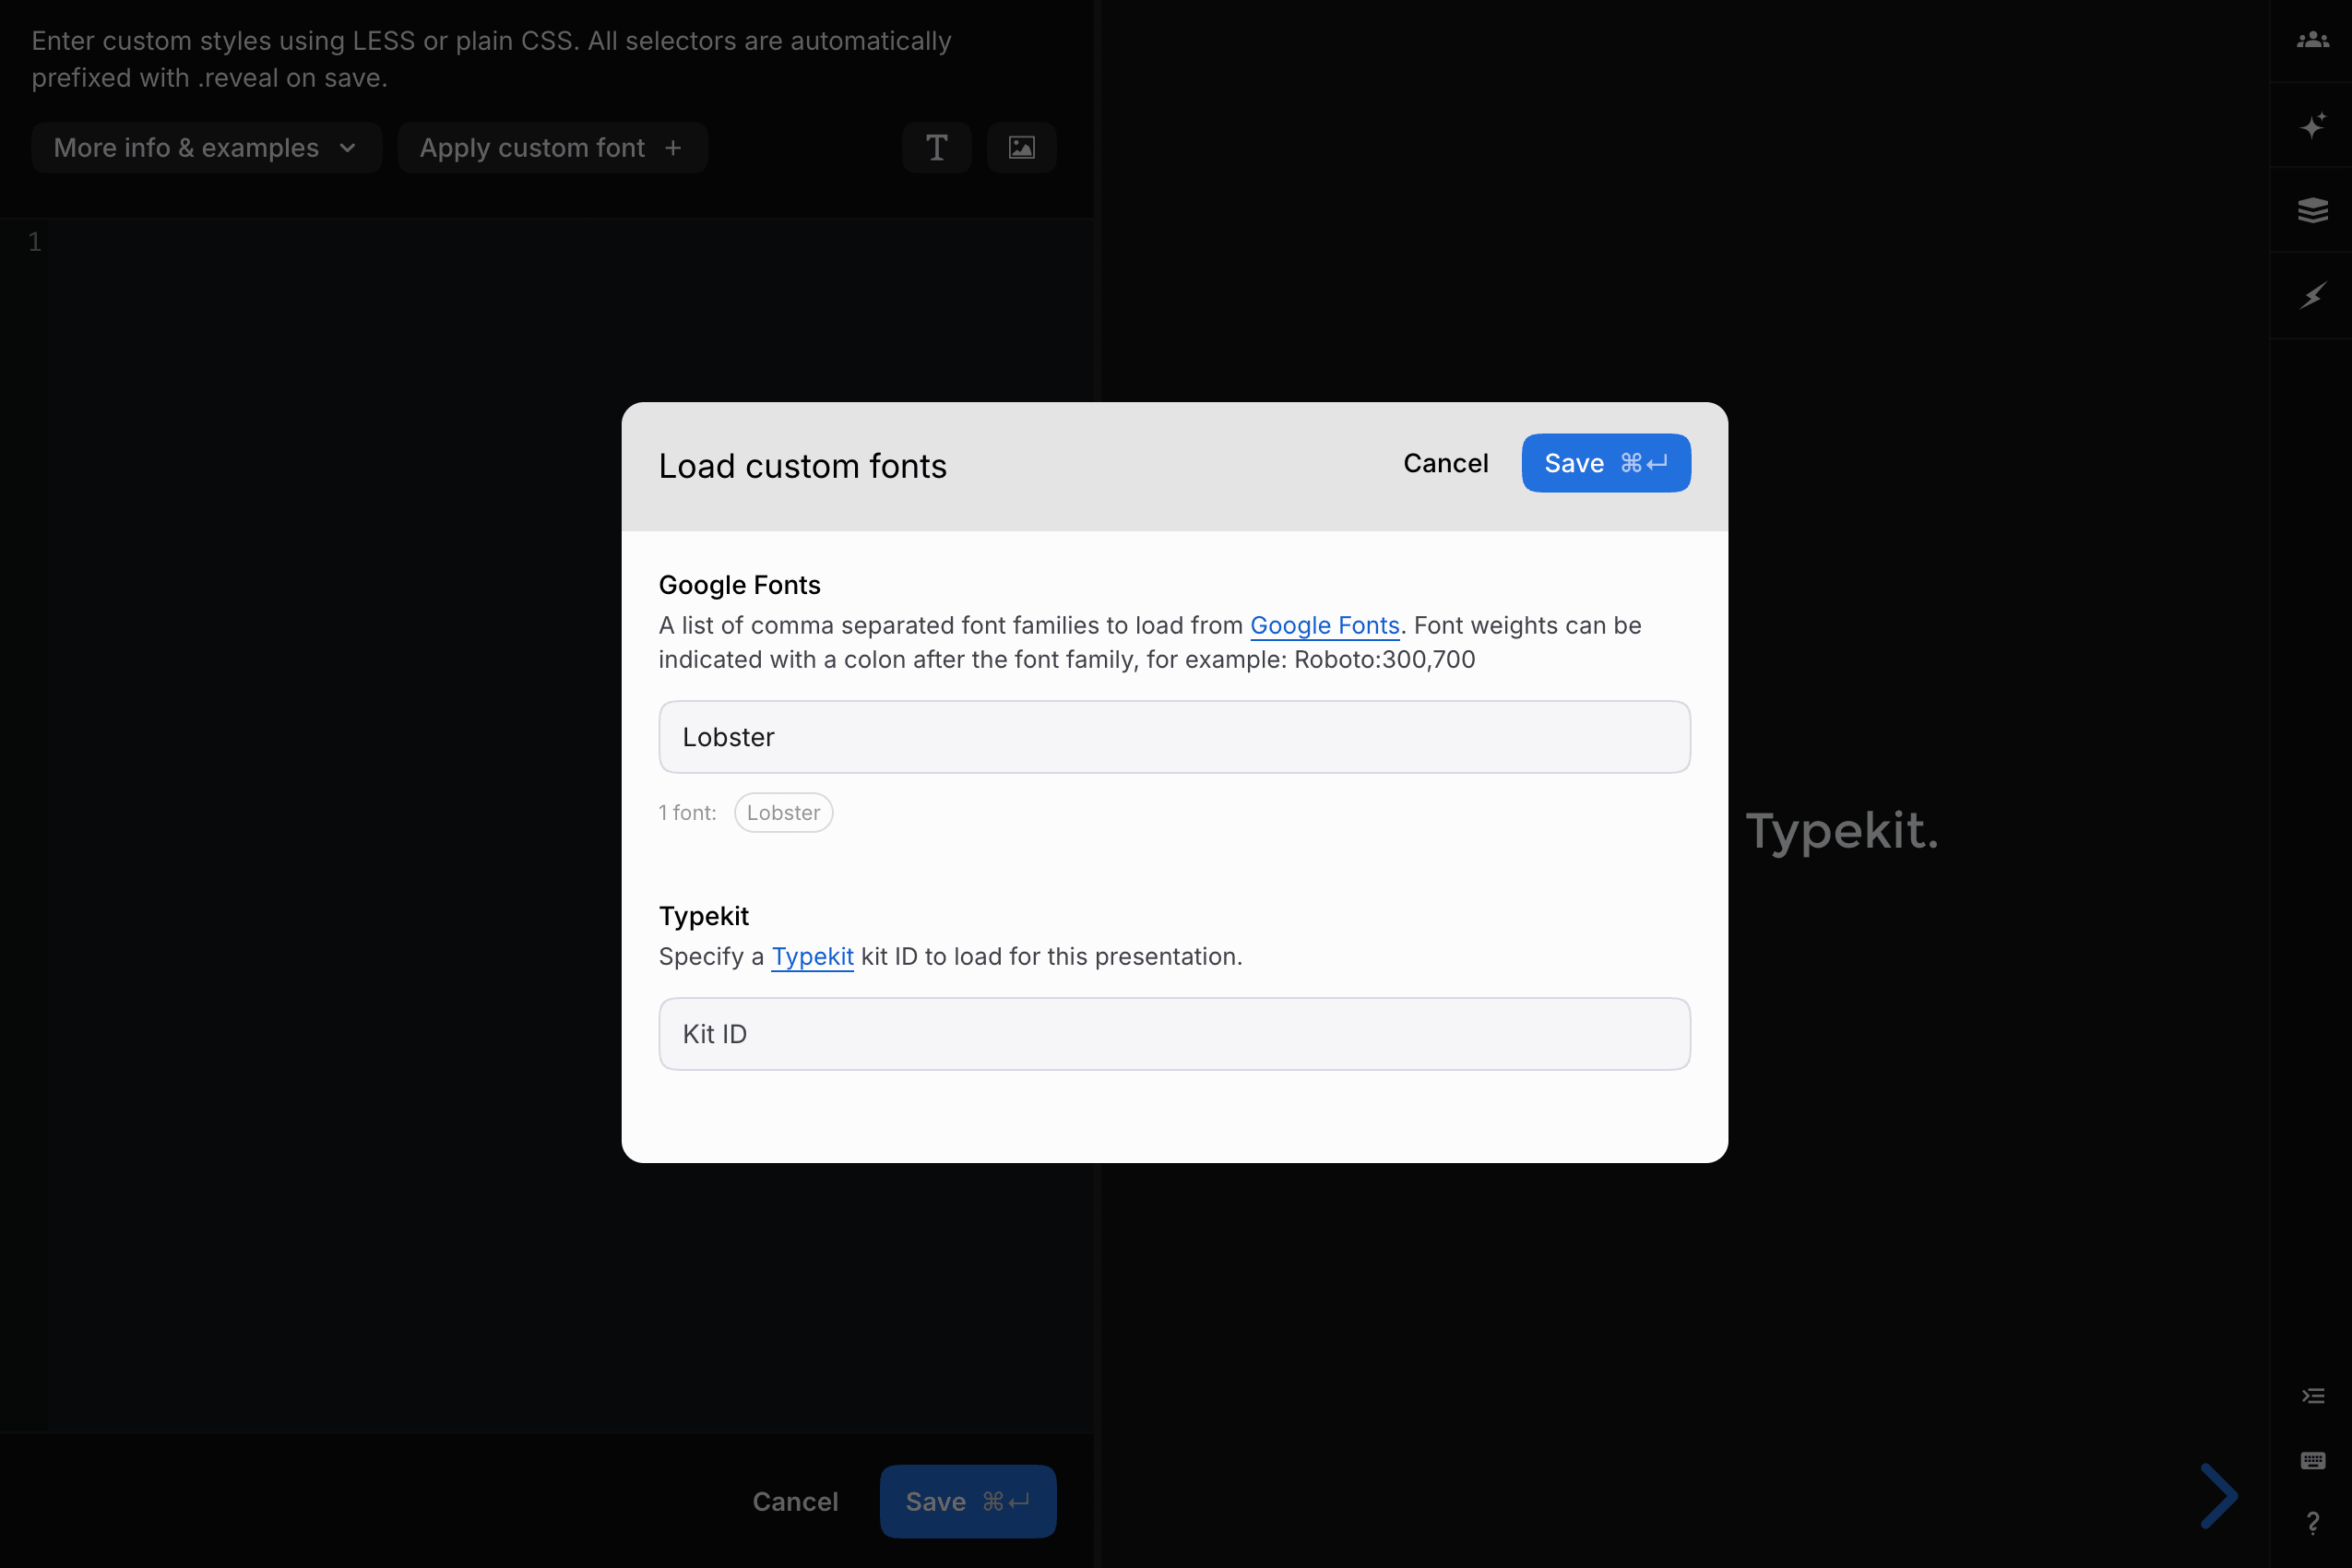
Enter the Google Font families you want to load. Slides suggests matching fonts as you type. Select Save when you are finished.
-
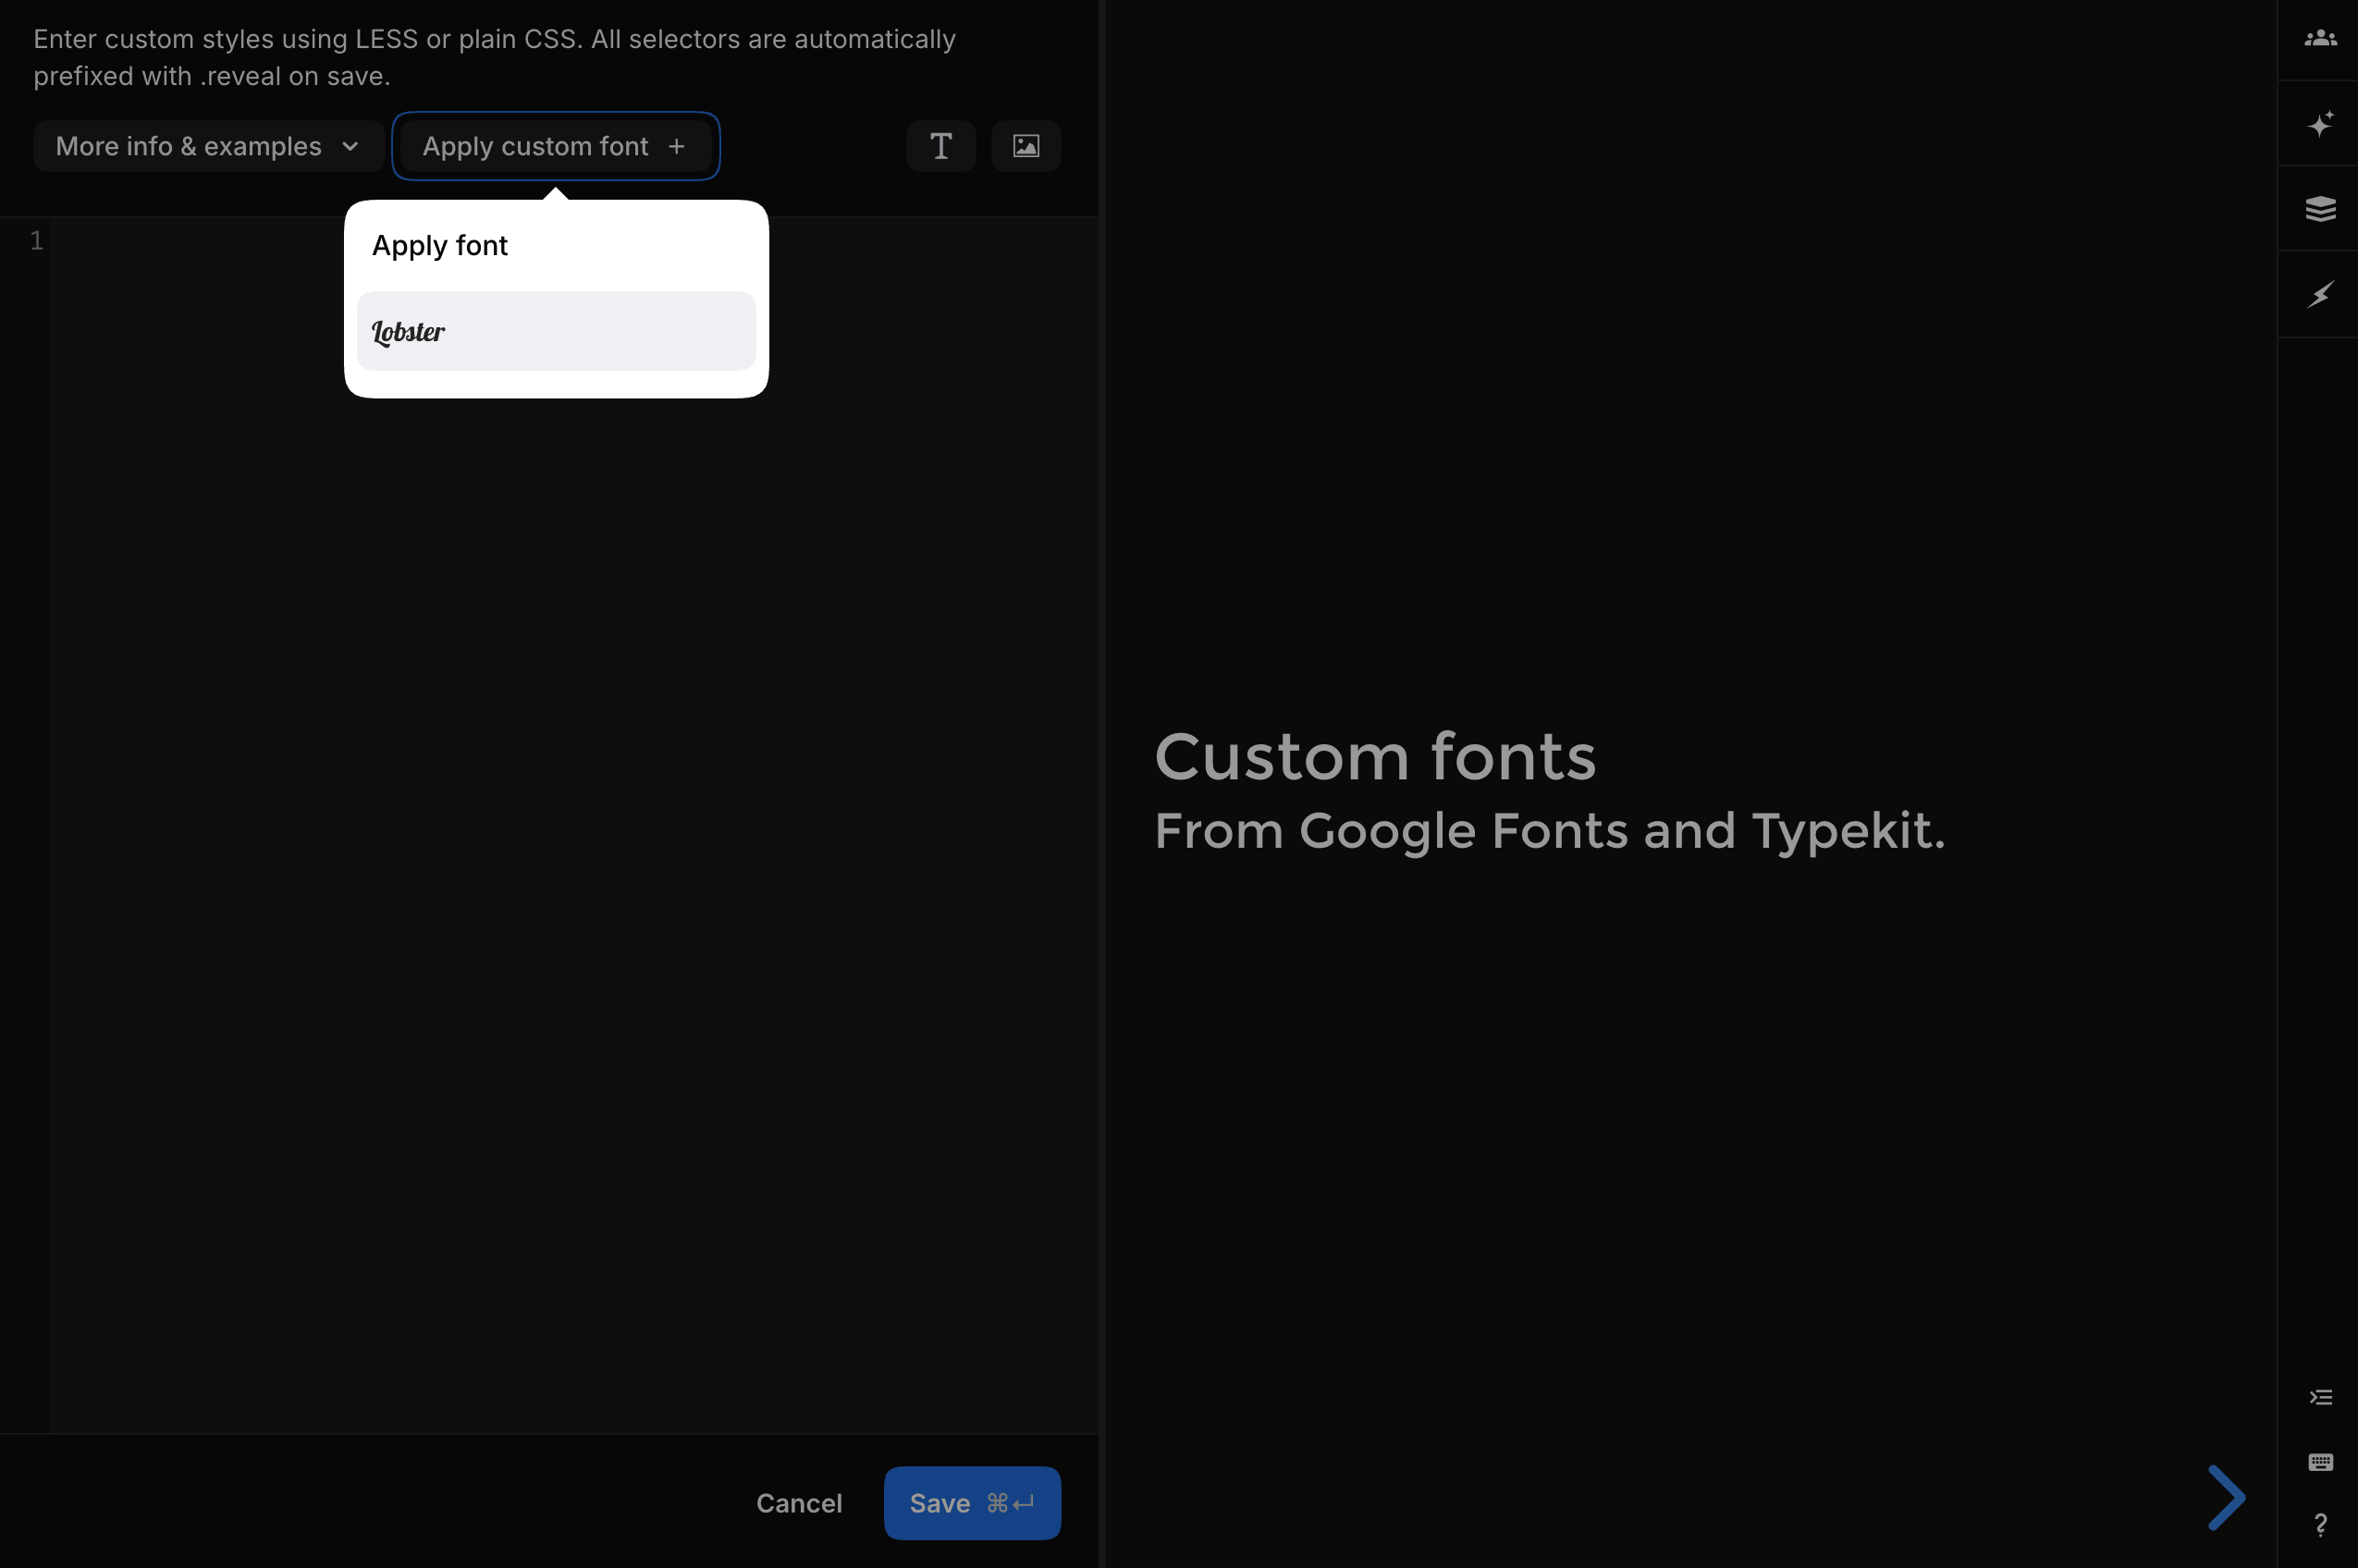
Select Apply custom font above the CSS editor, then choose the font you want to use.
-
Choose where to apply the font: Body text, Heading 1, Heading 2, or Heading 3. You can select more than one option. Select Apply to add the required CSS.
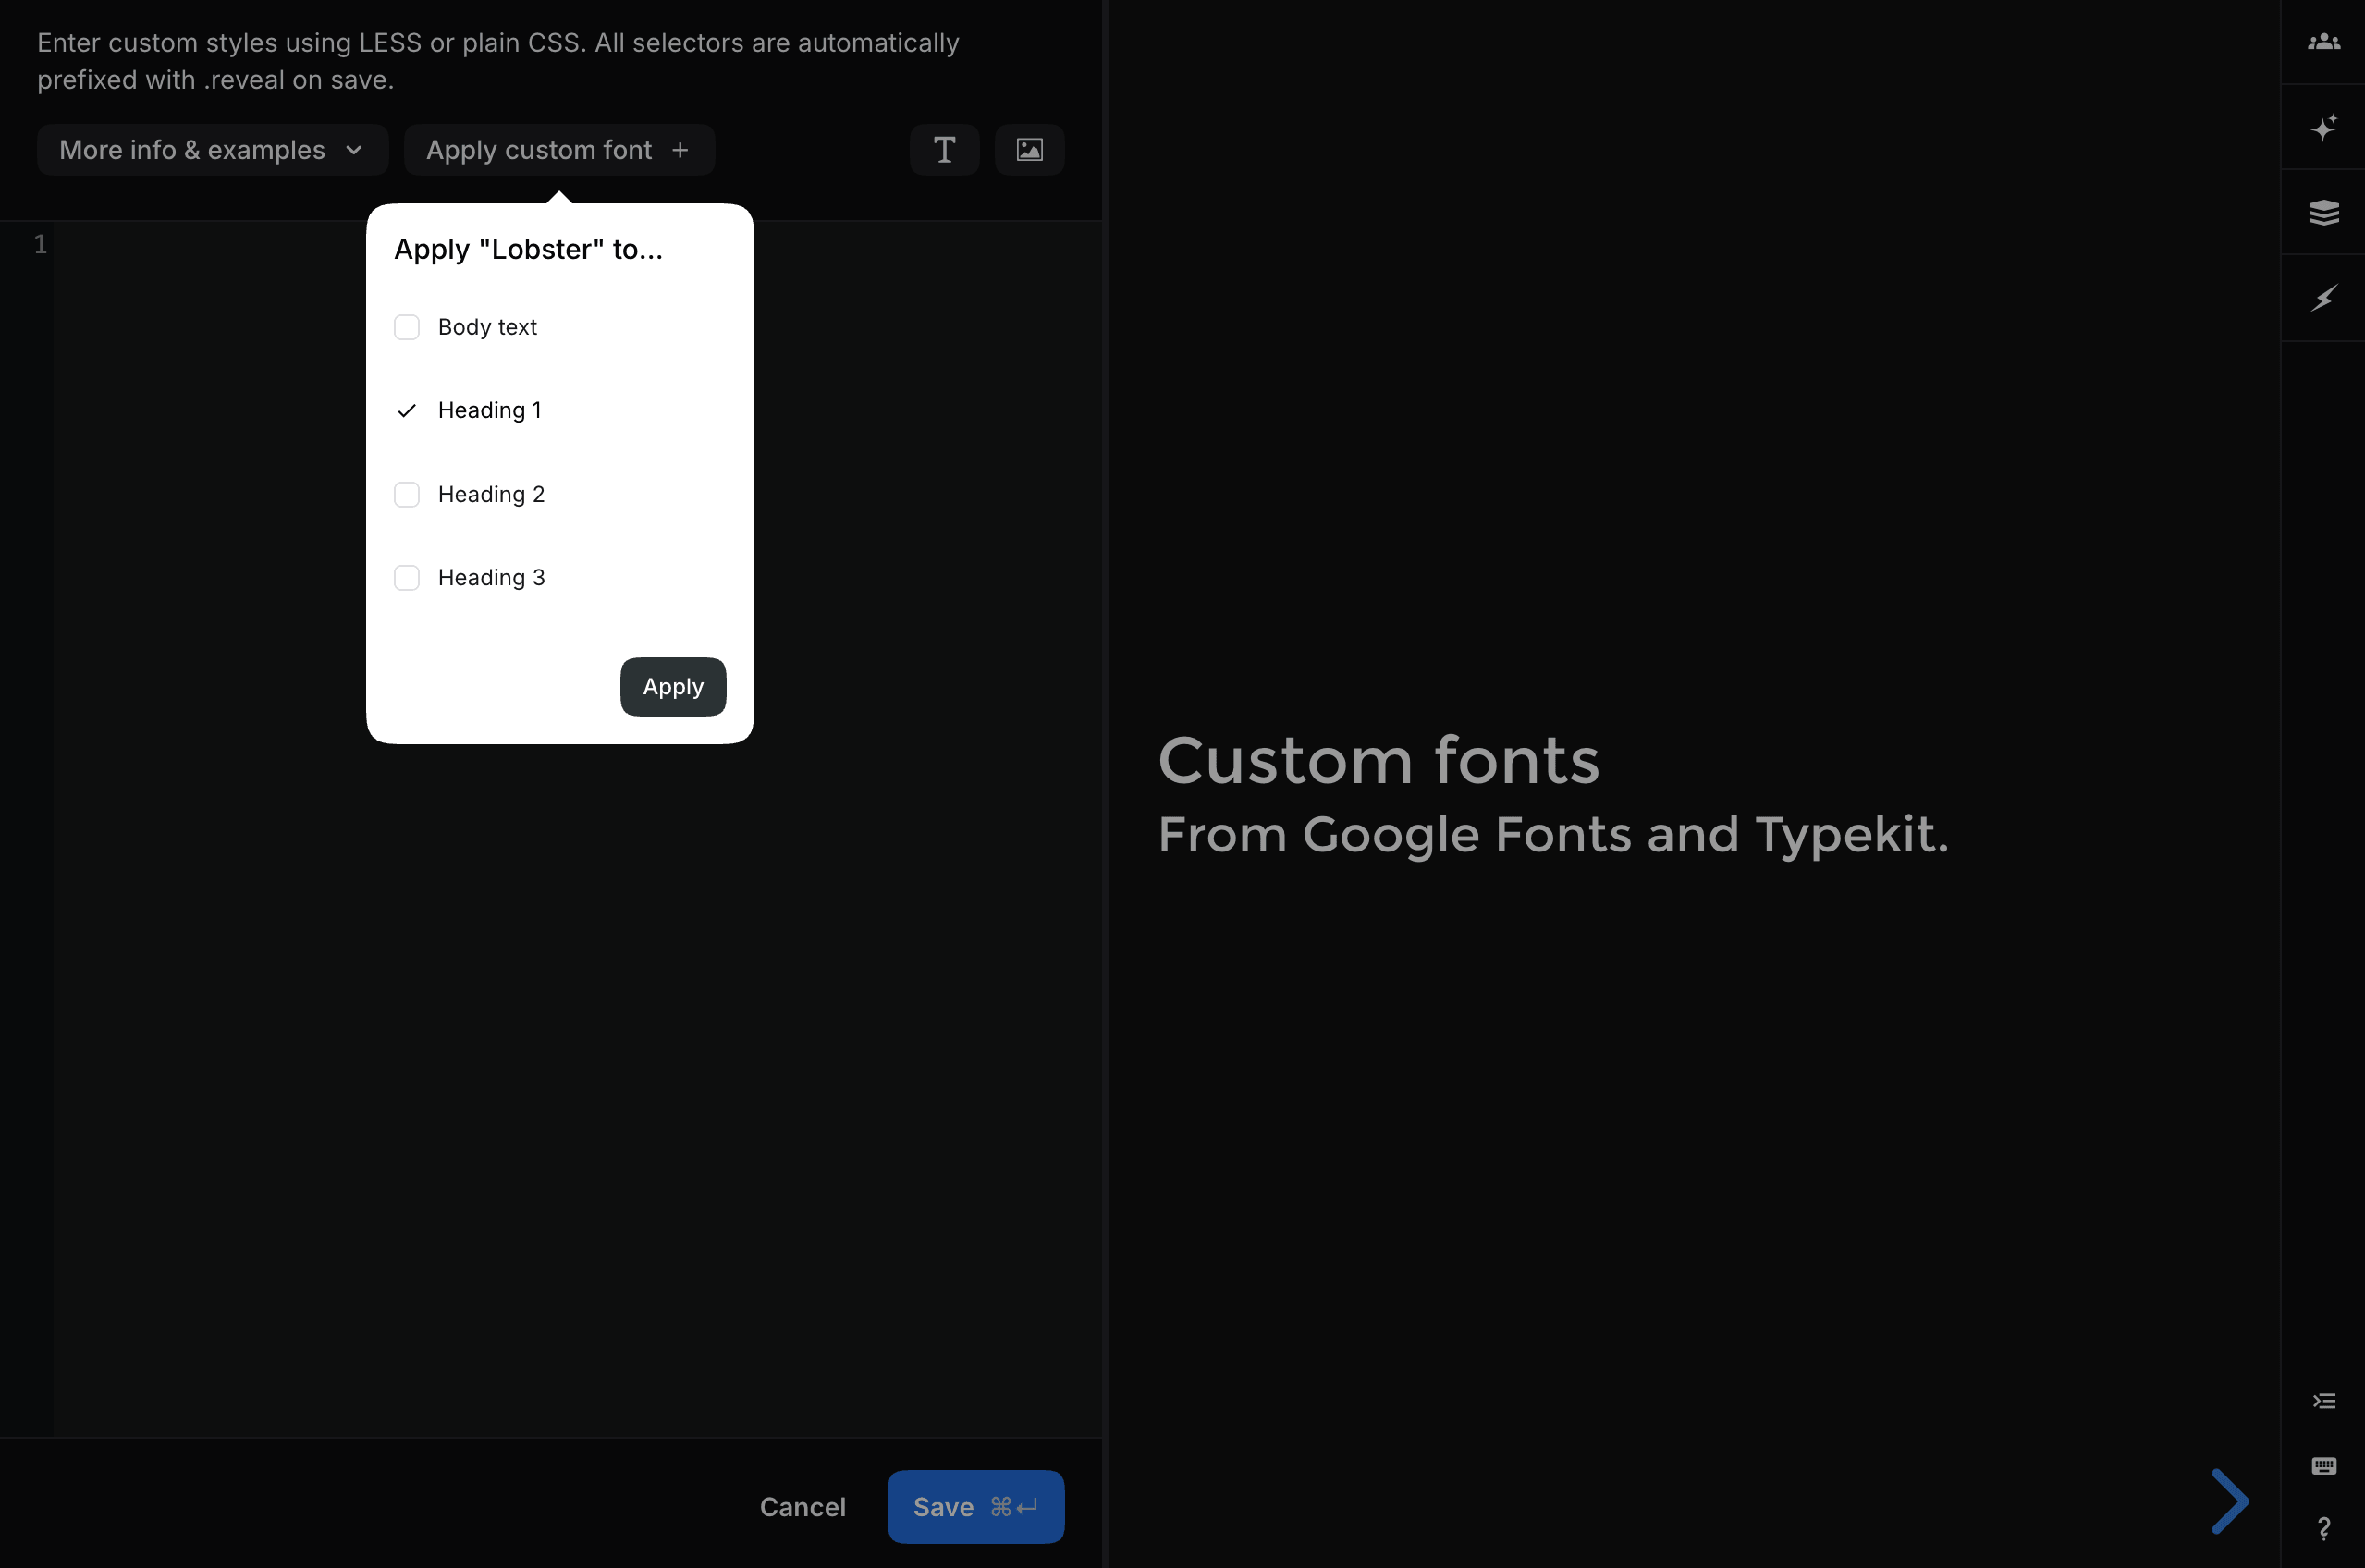
The generated CSS appears in the editor and the presentation preview updates to show the result.
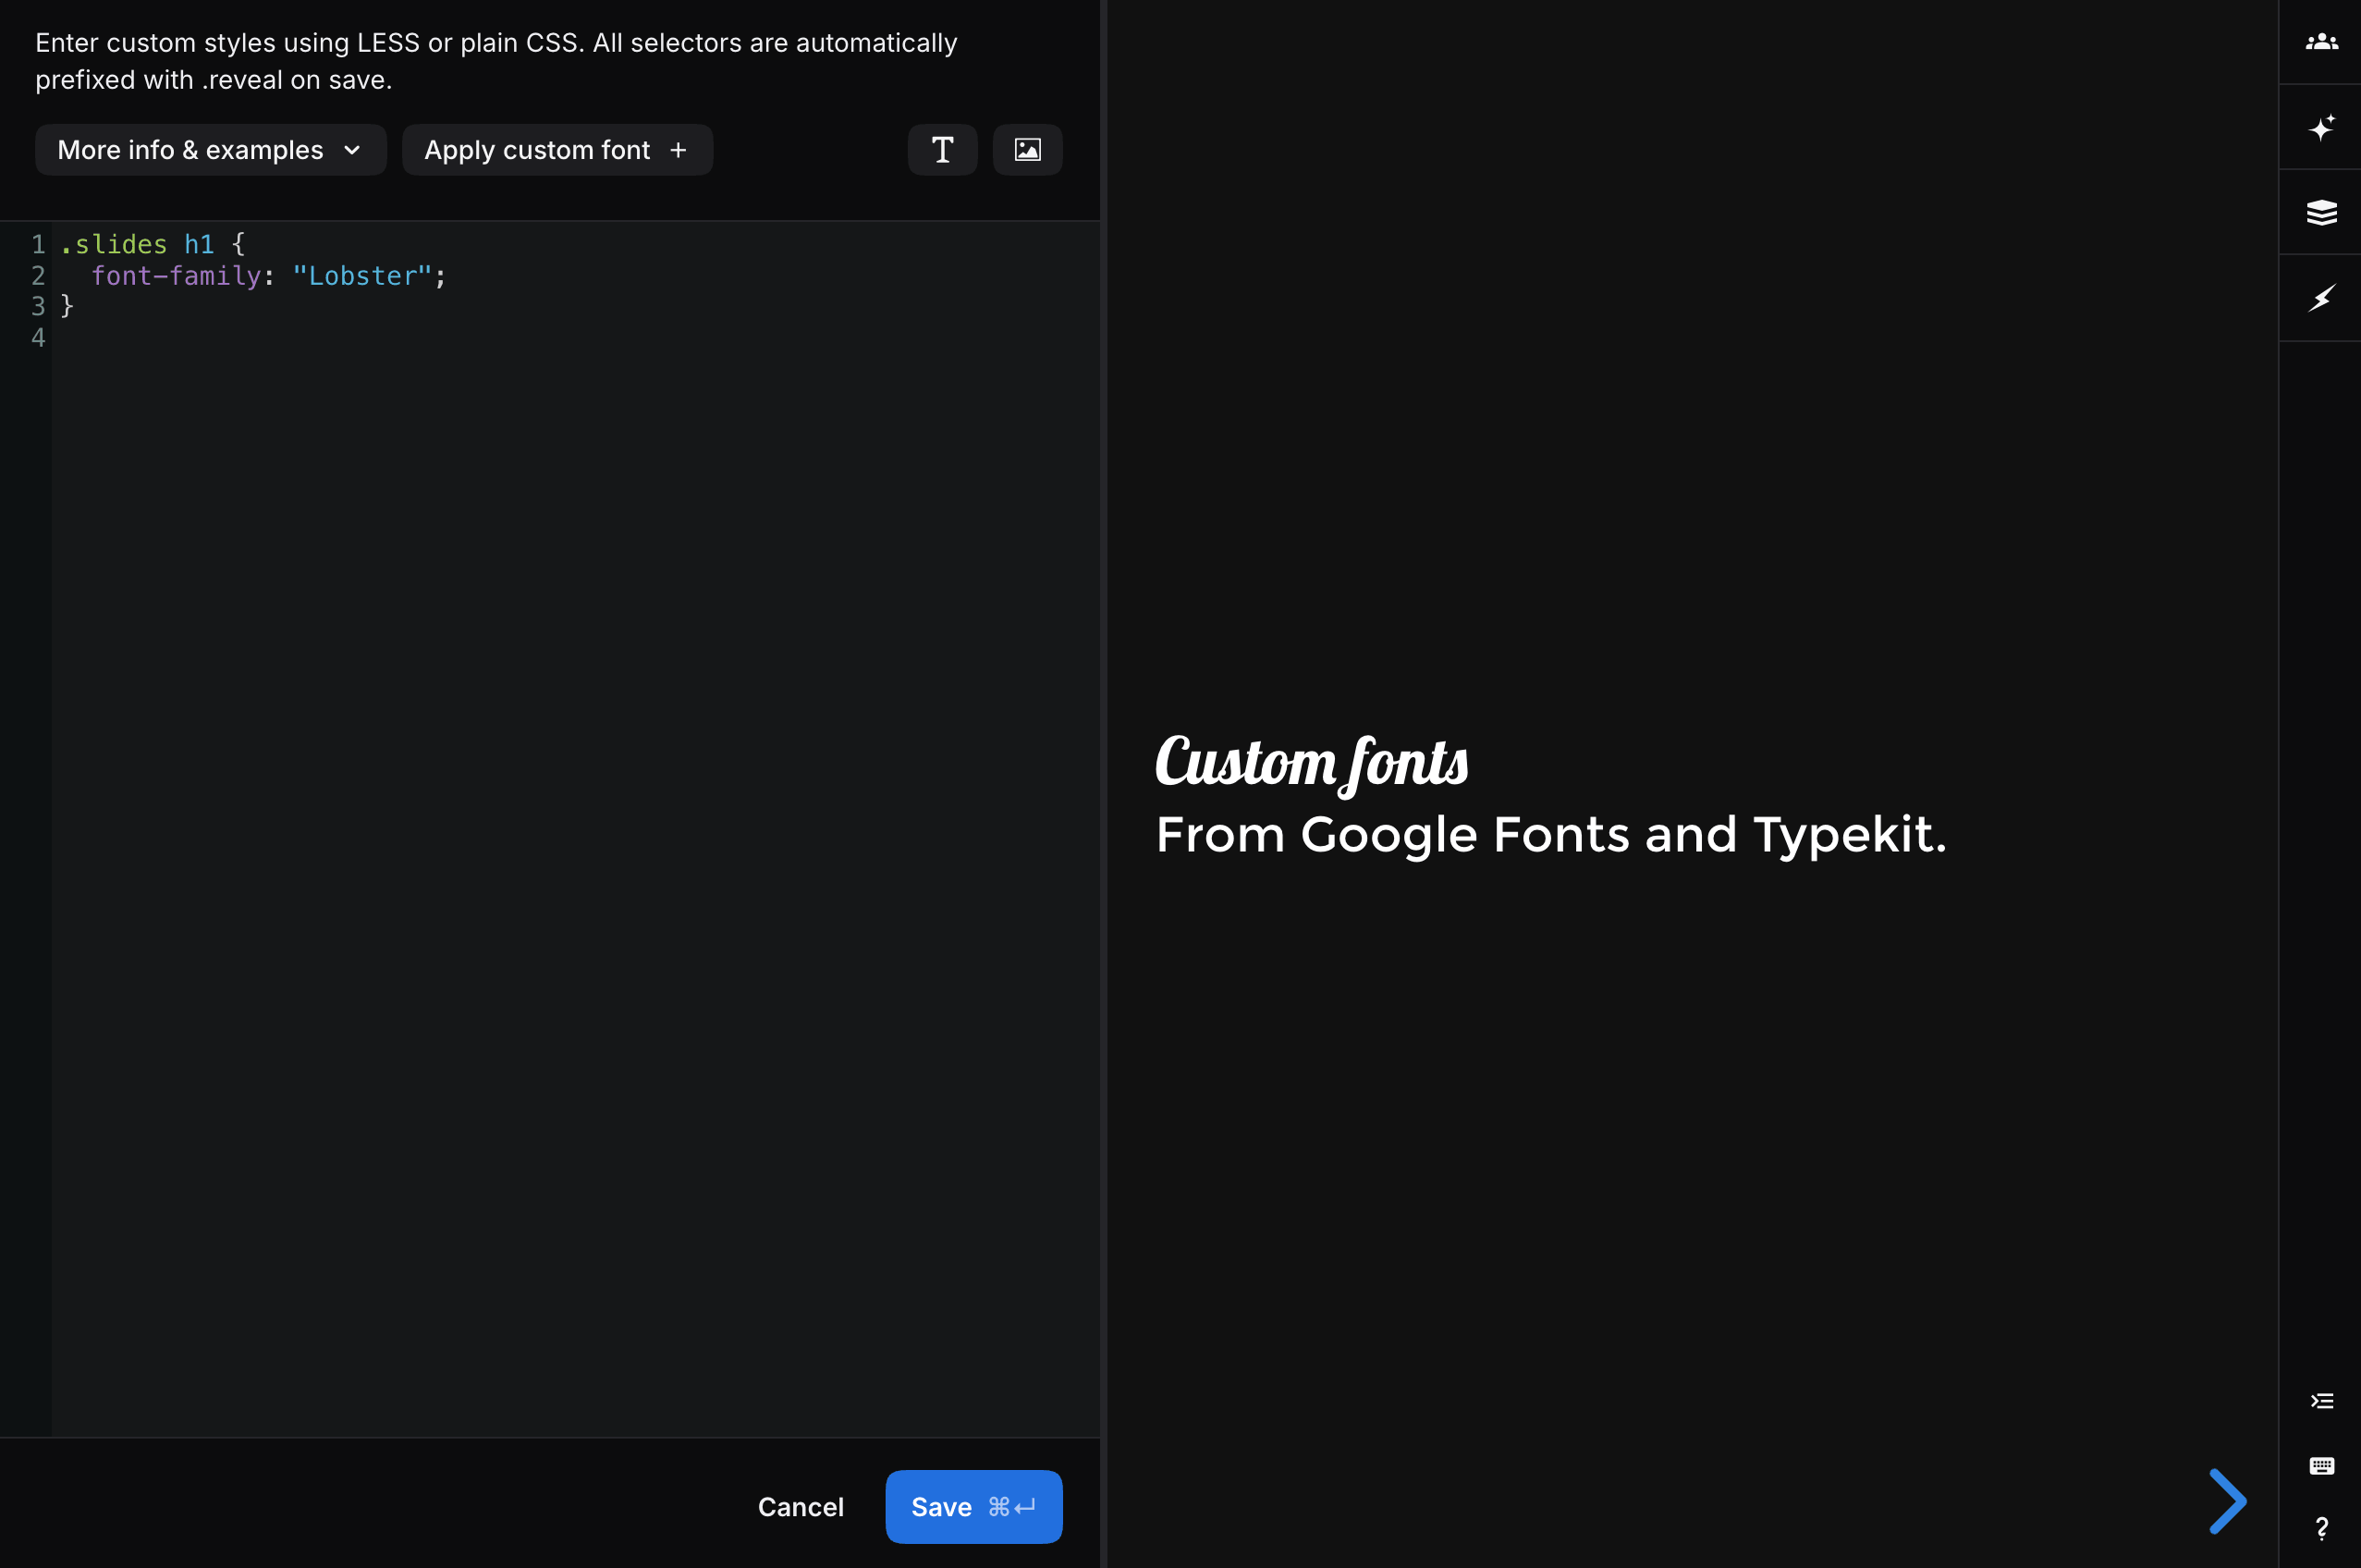
Here's an example where a custom font called "Lobster" is applied to all headings and "Open Sans" is used for body text:
// Use the "Lobster" font for all headings
.slides h1,
.slides h2,
.slides h3 {
    font-family: "Lobster";
}

// Use "Open Sans" for body text
.slides {
    font-family: "Open Sans";
}
Use fonts from Adobe Fonts
-
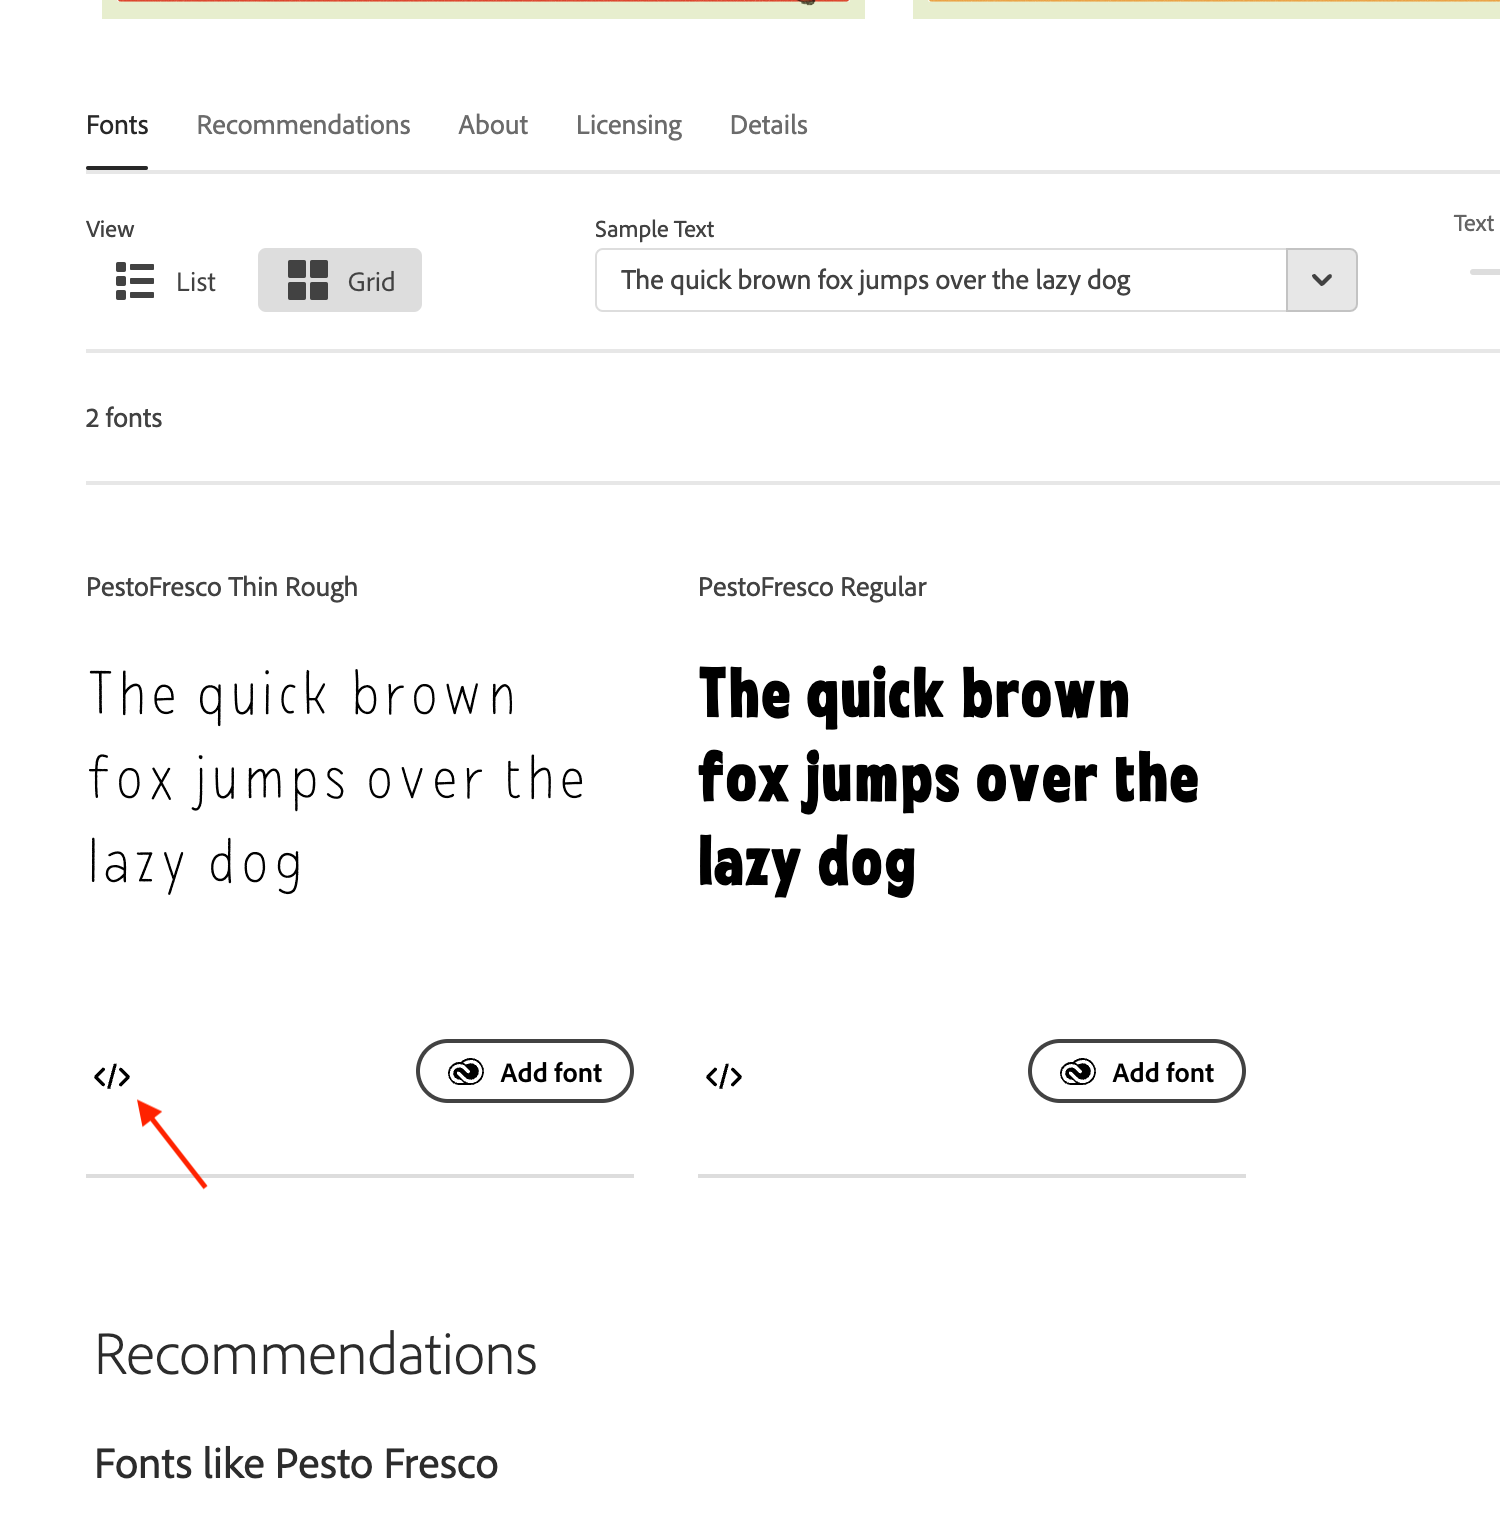
Add your font in Adobe Fonts.
-
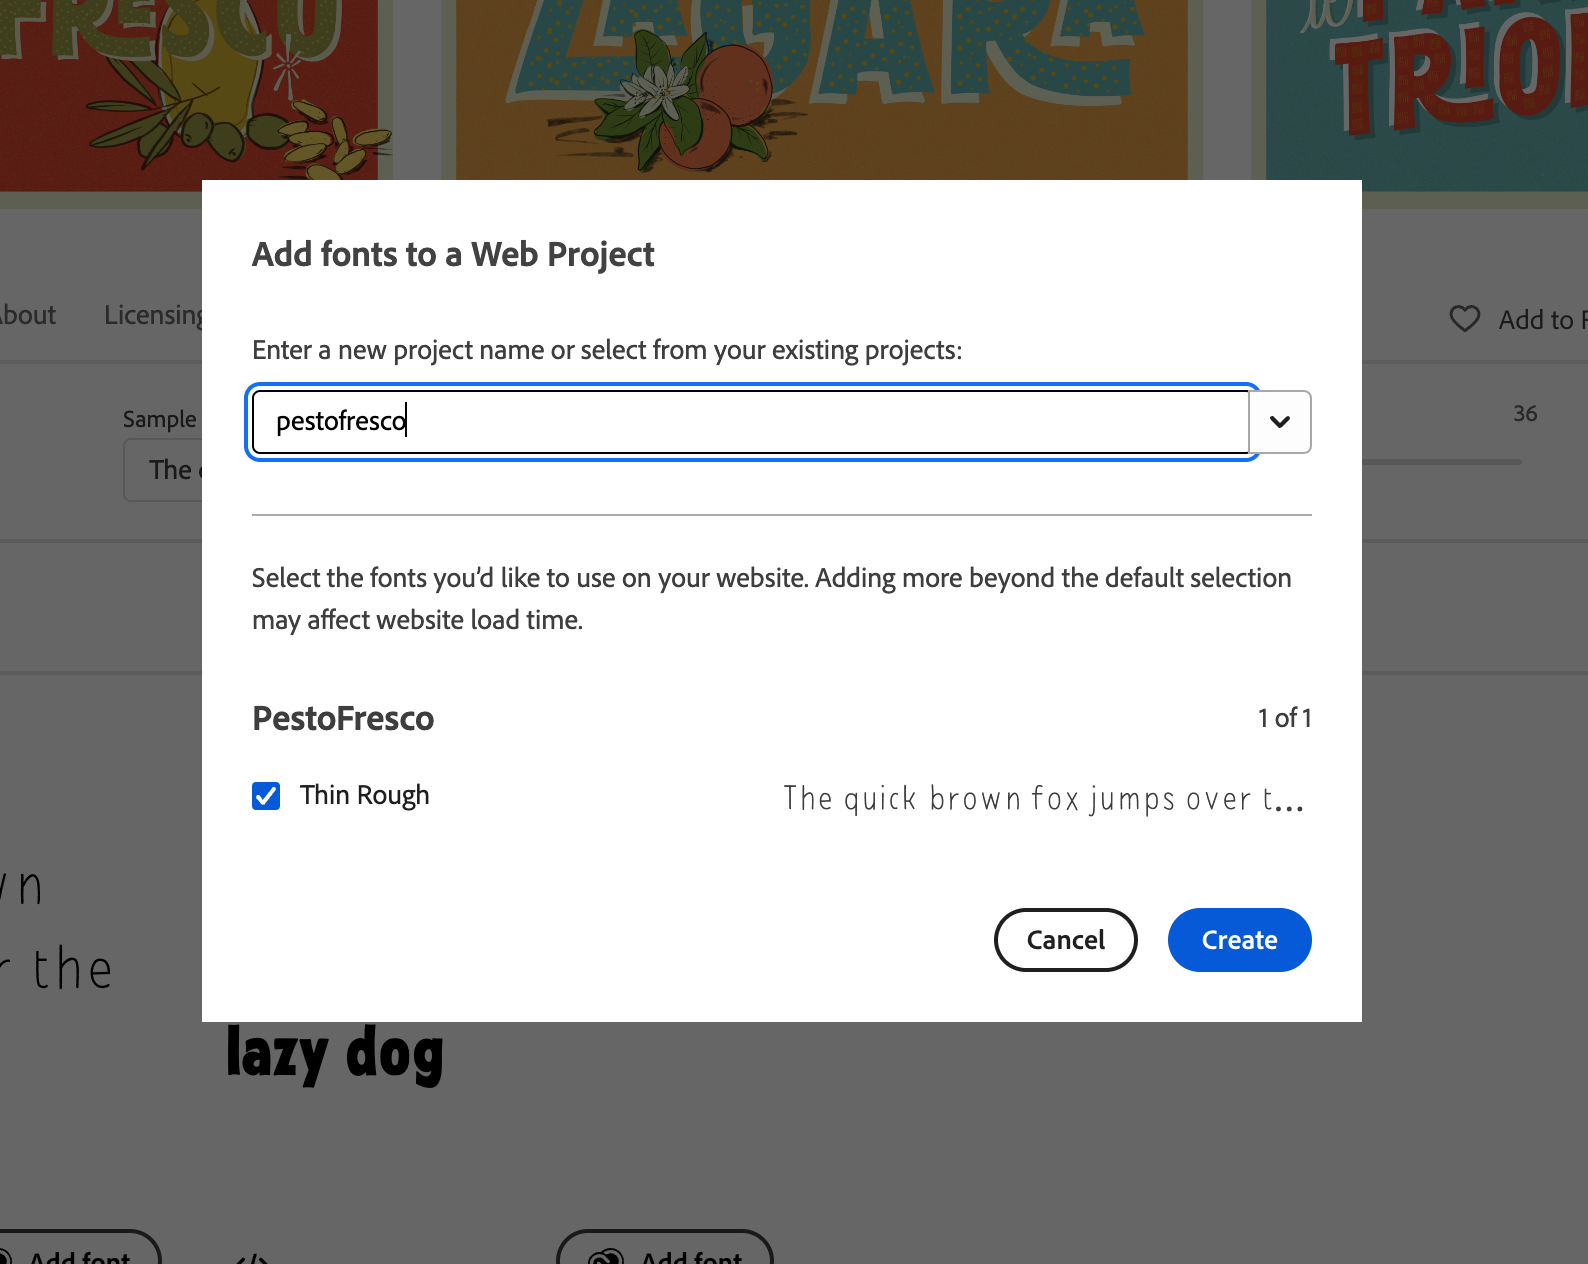
Create a new web project.
-
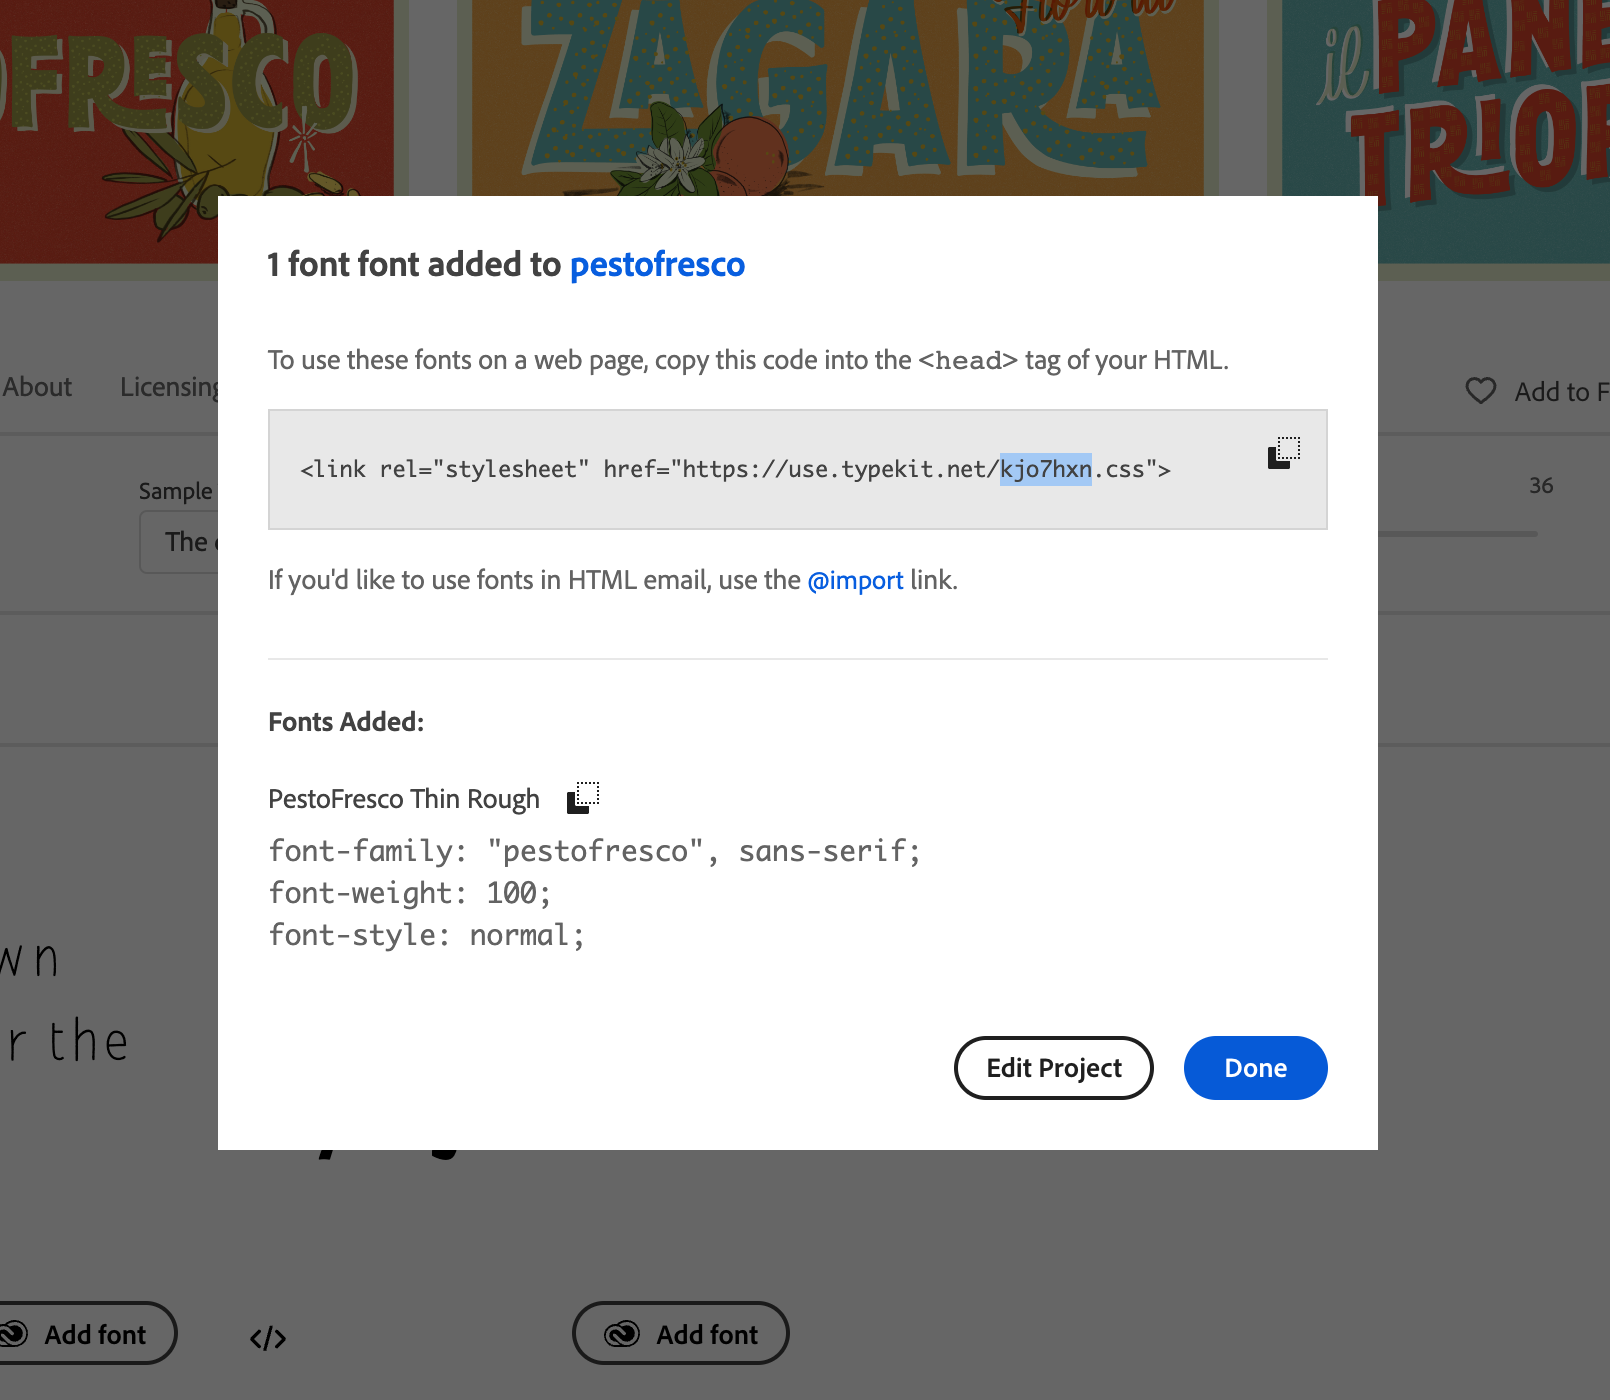
Copy the project ID from the embed code.
-
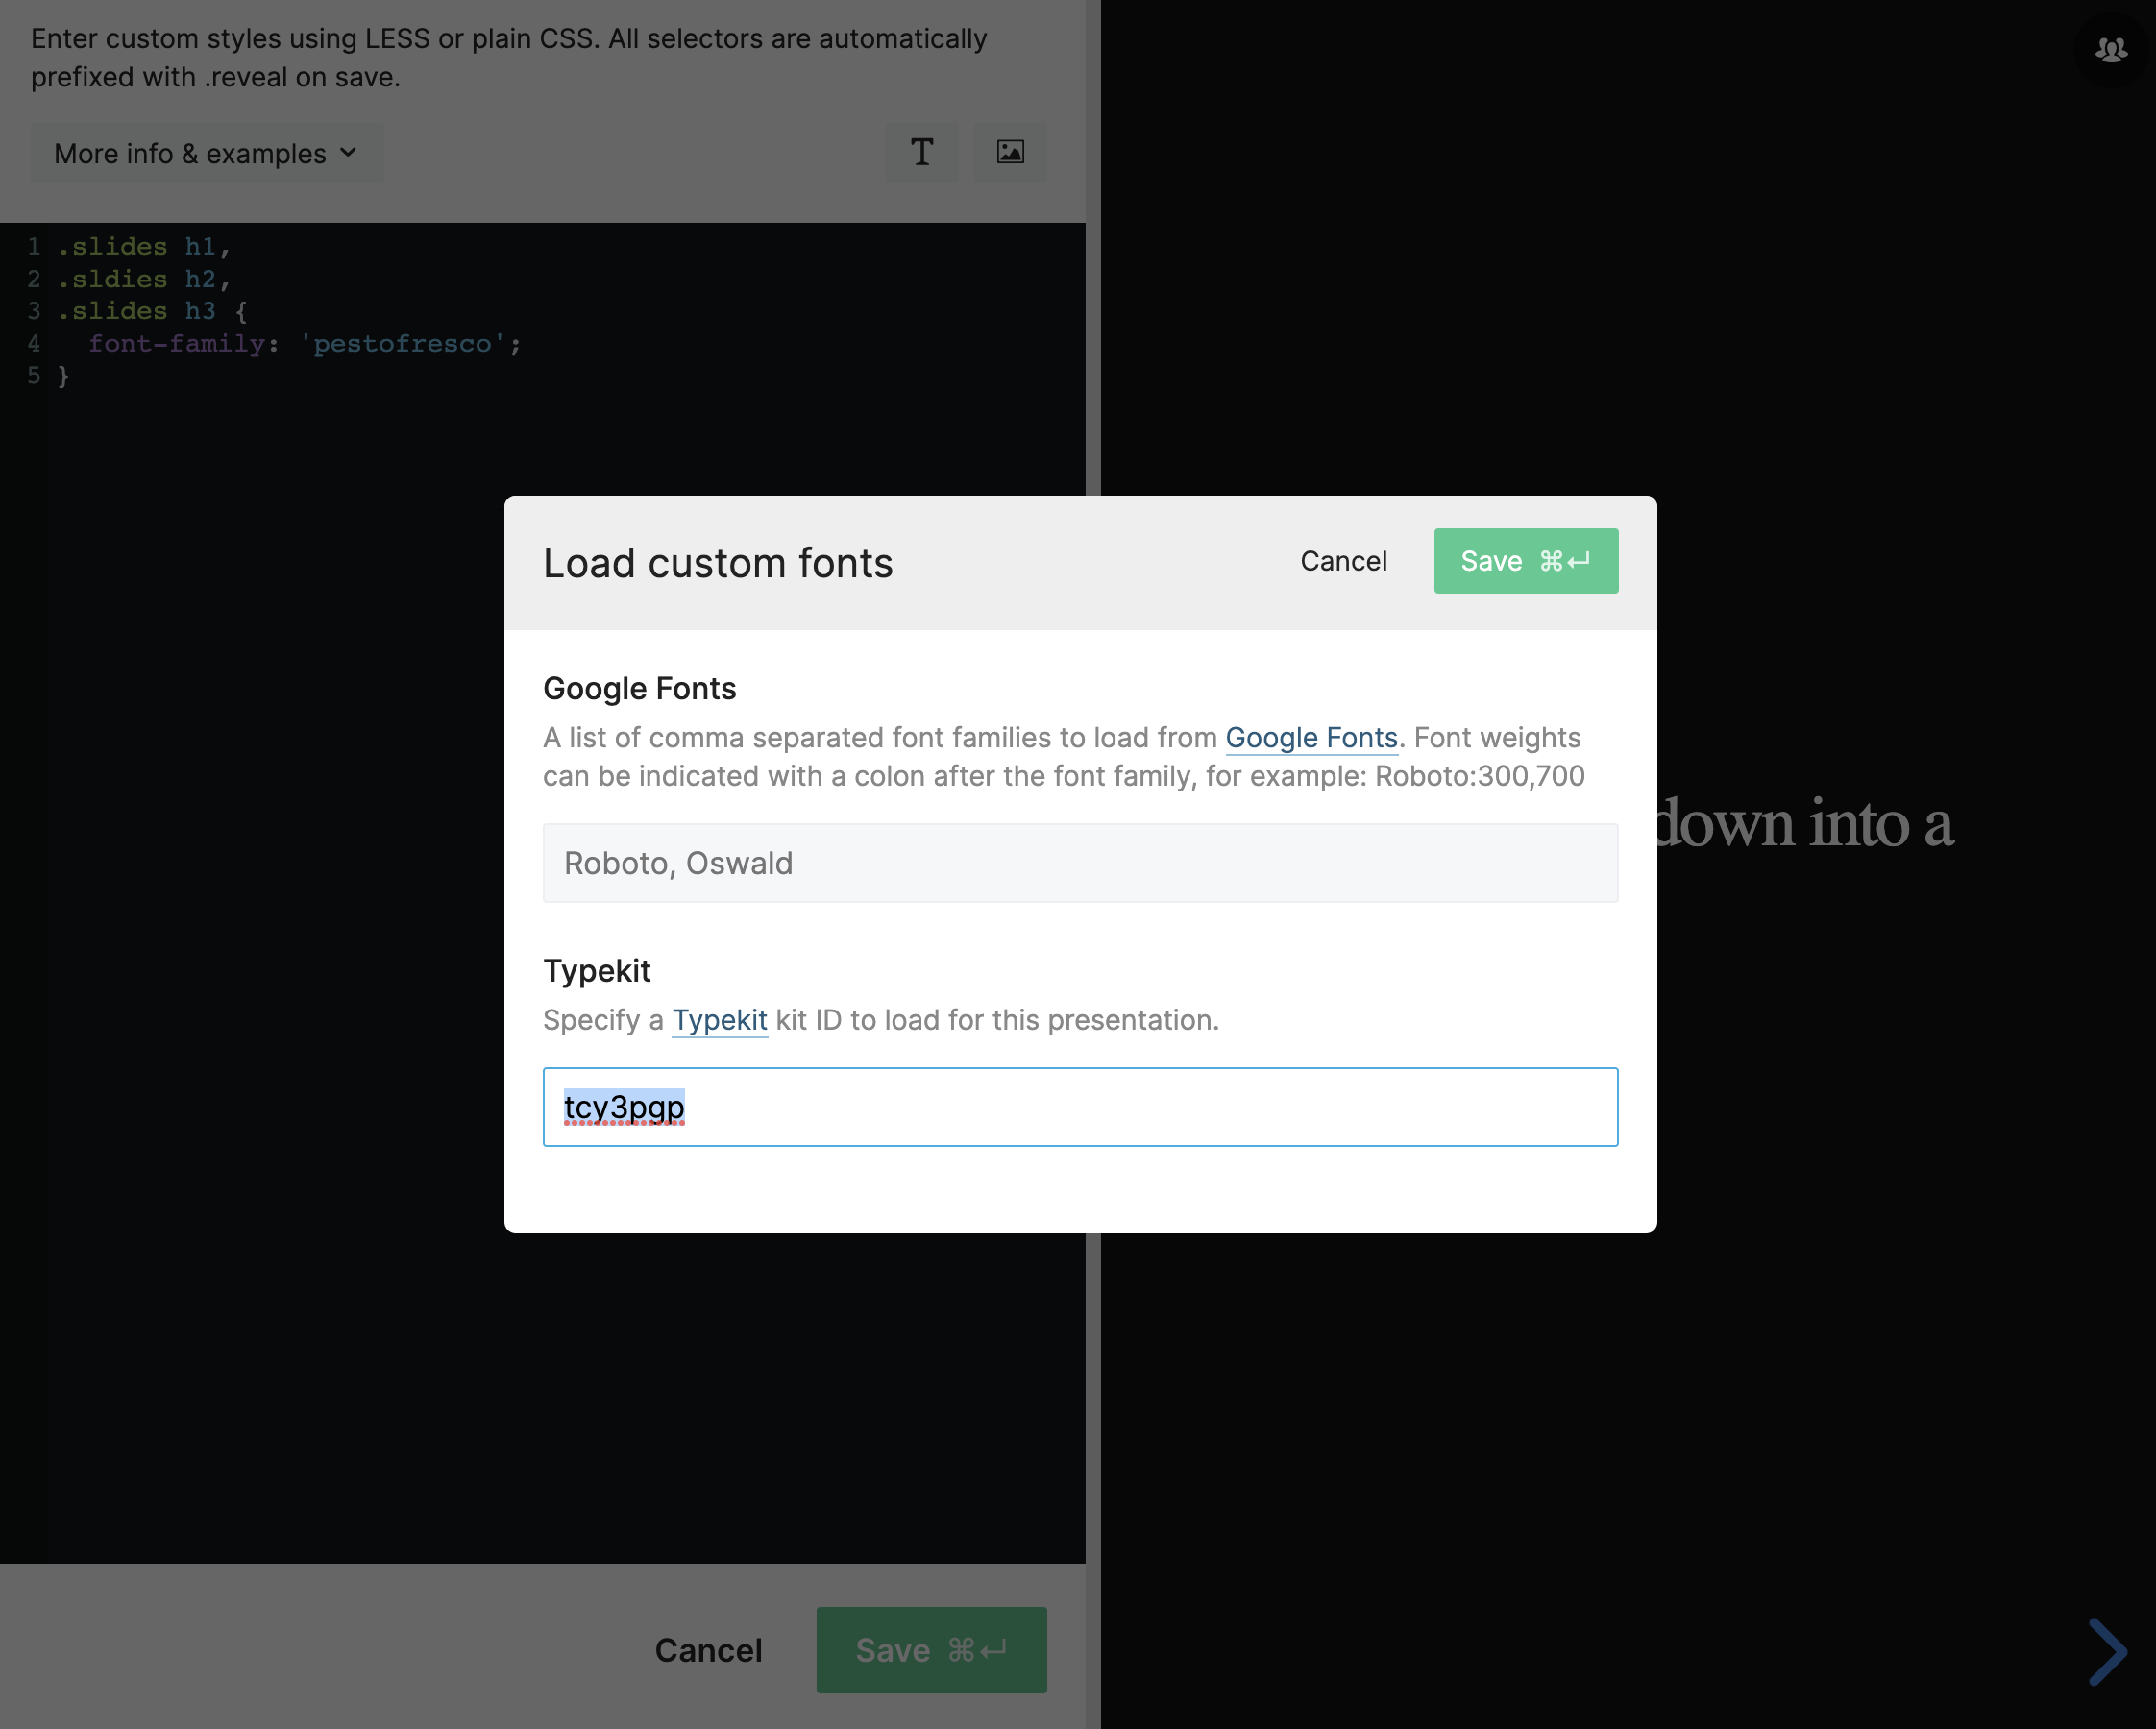
Add the project ID in the Custom fonts dialog in the Slides CSS editor.
-
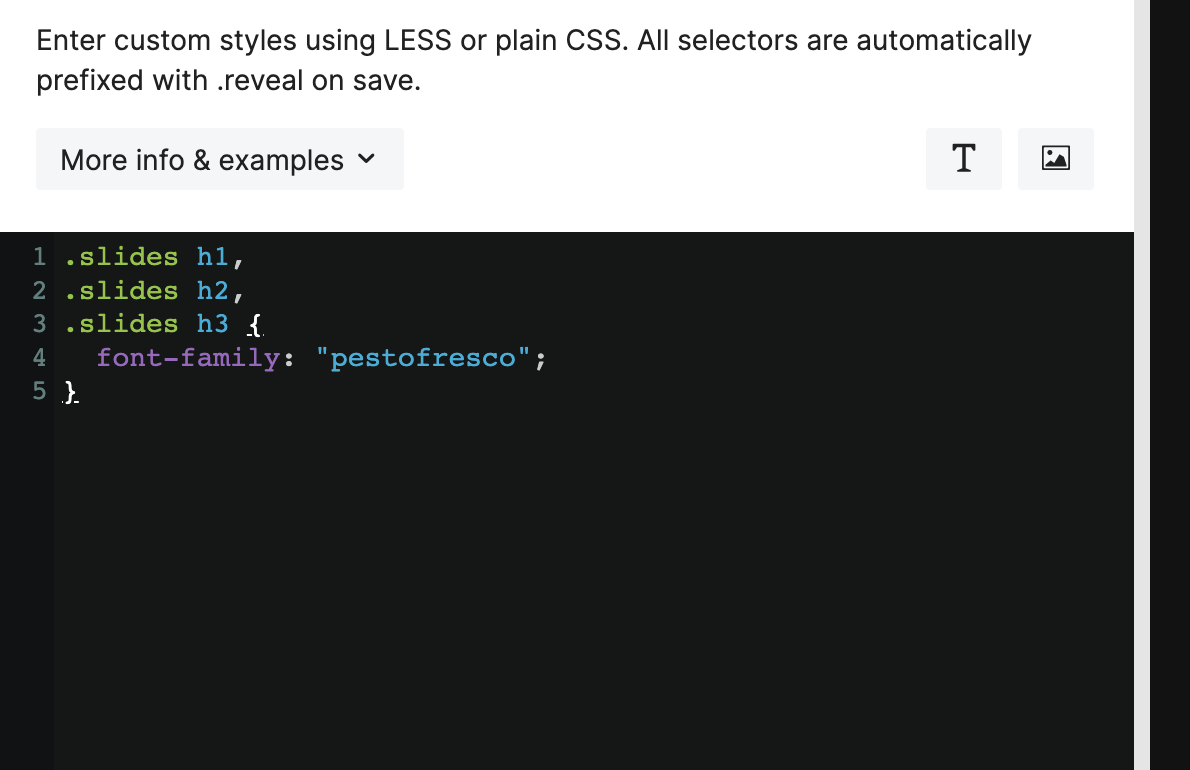
Apply the font with CSS. Use the font name exactly as shown in step 3.
Allowed domains
Make sure your Adobe Fonts web project allows fonts to load on the slides.com and *.slides.com domains.
Font names
To find the name to use in your CSS, open your web project in Adobe Fonts. These names aren't always predictable. For example, Fira Sans may be named something like fira-sans-2.
Use fonts from another host
You can load custom font files directly from another domain.
- Open the CSS editor.
- Define your font using
@font-faceand apply it to your content. For example:
// Include a custom font
@font-face {
  font-family: "Cabin Sketch";
  src: url("https://static.slid.es/fonts/cabinsketch/cabinsketch-regular.woff") format("woff"),
       url("https://static.slid.es/fonts/cabinsketch/cabinsketch-regular.ttf") format("truetype");
}

.slides h1, .slides h2, .slides h3 {
    font-family: "Cabin Sketch";
}
Server requirements
Externally hosted font files must be served over HTTPS.
The server must also allow the files to be loaded from the slides.com and *.slides.com domains. Browsers block this kind of cross-domain loading by default unless the server permits it through Cross-Origin Resource Sharing (CORS). Learn more about configuring CORS.
Apply fonts with CSS
When applying custom fonts or other CSS, make your selectors specific enough to override the default Slides styles. The easiest approach is to prefix the selector with .slides:
// Apply font to headings
.slides h1, .slides h2, .slides h3 {
  font-family: "My Custom Font";
}

// Apply font to body text
.slides {
  font-family: "My Custom Font";
}

// Apply font to links
.slides a {
  font-family: "My Custom Font";
}
Presenting offline
Custom fonts loaded from a third-party server do not work in offline ZIP or Dropbox exports. They are included when exporting to PDF.